Interested in Drilling?
Get Drilling articles, news and videos right in your inbox! Sign up now.
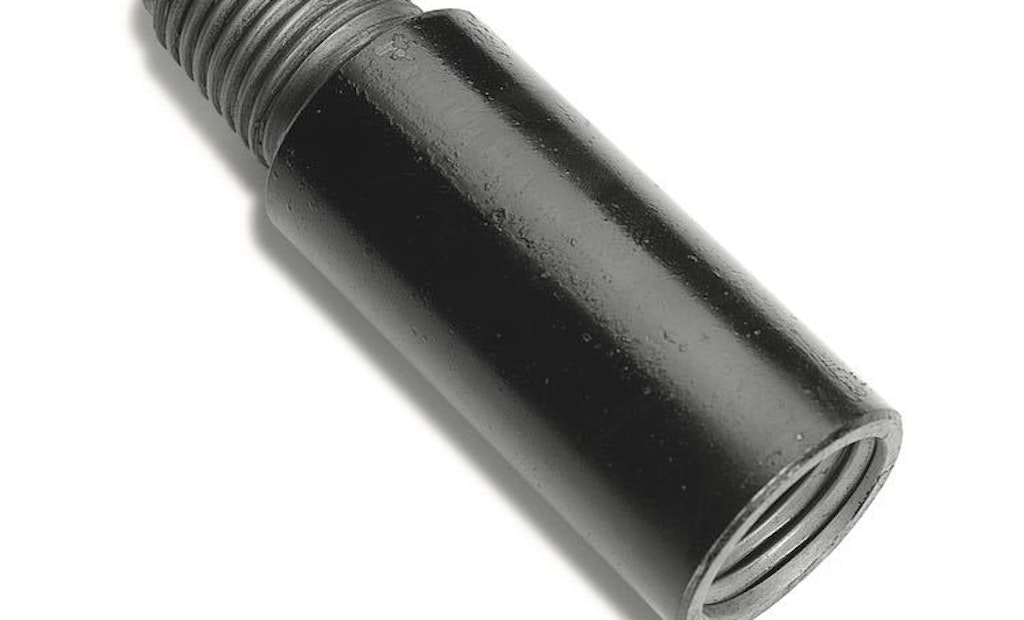
Drilling + Get AlertsReplacing the sub saver on a horizontal directional drill when the threads have become worn is an economical and easy way to help maximize the life of the drill rod and reduce damage on the drive chuck.
The condition of the threads on the sub saver is essential because they can leave their imprint on every drill rod in your basket, so it's important to inspect the threads after every job and replace it when there ares signs of wear.
Inspecting the sub saver
"Every drilling crew should have a set of profile gauges with them on the job,” says Jason Zylstra, product manager for the Vermeer BORESTORE HDD tooling and accessories warehouse. “These gauges line up with the threads on the sub saver and drill rod to help a contractor identify wear. If there is light between the gaps of the profile gauge and the threads of the sub saver, it’s time to change it out.”
Another way to check for wear on the sub saver, if there isn’t a set of profile gauges on hand, is by doing a visual inspection. The threads of the sub saver should appear smooth. If they look coarse instead, it's an indication there’s an alignment issue going into the drill rod. It may have started to cut its own threads inside of the drill rod, creating burrs that can make it more challenging to break joints.
Replacement process
Applying heat to the threads between the sub saver and the drill’s drive chuck will help break the connection. Zylstra says it's important to only focus the heat on the thread area where a locking compound was used. “The drive chuck is a heat-treated piece of material so applying heat to all of it could cause damage.”
After the connection has heated up, use the drill’s vises or a set of breakout tongs to remove the old sub saver. After it's removed, make sure the threads on the drive chuck are clean and in good shape before installing the new sub saver.
Before threading the new sub saver on, apply a thread-locking compound in three spots on the threads of the drive chuck. "Vermeer sub saver kits come with a thread lock compound,” Zylstra says. “Once the new sub saver is threaded to the drive chuck and torqued, contractors should give the thread-locking compounds 24 hours to properly set up. When possible, it’s a good idea to replace the sub saver before a weekend or when the drill won’t be in use for a full day.”
Extending the life of your sub saver
Zylstra offers contractors a few tips to maximize the life of a drill’s sub saver and properly care for its thread:
Keep it clean. At the end of every bore, clean and remove built-up grease on the vise jaws and the threads of the sub saver. Metal shavings, dirt and stones can become lodged in the grease and will lead to wear on the threads of the sub saver and drill rod. Washing off the grease will help prevent the threads from deteriorating.
Properly torque every drill rod. Under-torquing drill rods will cause a gap between connections and put more stress on the threads, which will lead to premature wear on the sub saver and drill rods.
Make sure the drill’s vises are clamping in the right spot. Adjust the drill’s vise clamps 2 to 3 inches behind the threads of the sub saver. Do not overlap the connection when clamping down because it will eventually cause the metal to smear. If it does clamp in the wrong place by accident, buff and clean the rod to help prevent future wear.
Carry an extra
“It’s also a good idea for crews to take an extra sub saver with them on every job,” Zylstra says. “Having to drive to the dealership for a replacement sub saver or waiting around for one to be delivered hurts productivity.”
The drill rod can be the most expensive investment on a directional drill. Maintaining and replacing the sub saver when worn will help protect that investment.
For more information about the Vermeer sub saver, contact your local Vermeer dealer or visit borestore.com.


