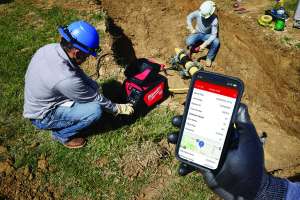
Operating a horizontal directional drill is a bit of an art, but it takes science to be successful. Science is at the heart of the drilling fluid that runs through the drill string, helping to ensure downhole stability while cooling and lubricating tooling, as well as helping extract cuttings.
Do you and your drilling crews understand the science involved with mixing drilling fluids?
Why drilling fluid matters
Whether you specialize in fiberoptics, gas, electrical, water or larger pipeline installations, using the right type and the right amount of drilling fluid needs to be part of the planning process. Drilling fluid additives provide critical filtration and suspension characteristics allowing for today’s longer and larger bores to be completed. Without these very important characteristics, you risk inadvertent returns (frac-outs), heaving ground surfaces and pullback failures.
Drilling fluid additives
The first step in your planning process is to understand the soil conditions you will be working in. The conditions tell you what type of additives you need. For example, in nonreactive clay, you will likely only need a mixture of bentonite, which produces needed cutting carrying capacity to flush the bore hole, and a lubricant to keep soil from sticking and bit balling to your tooling. However, when you’re working in reactive clay, sand or cobble, you will need a polymer additive.
There are several types of polymer additives to choose from, each engineered to help you deal with specific soil conditions. PAC polymers are typically added to a bentonite mixture to help provide secondary filtration control (sands and cobbles). In formations with high concentrations of reactive clays, PHPA polymers are used in place of bentonite. PHPA polymers prevent clay from swelling by wrapping itself around the clay. A larger molecular weighted polymer is a good match for cobble and rocky conditions because it acts as a suspension aid and helps create a stable bore path and assists with extracting larger cuttings from the bore path.
If you’re not sure about the soil conditions you’re going to be working in or if you have questions about which mixing additives you should be using, talk to your local HDD equipment dealer. They will be able to tell you what other contractors are using in the area. Also, be sure to follow the directions on the side of the additive bag or container to determine the correct amounts.
Determining fluid amount needed
Using the correct amount of drilling fluids on a bore is another critical consideration. The volume of fluid you should use depends on hole diameter and soil conditions. Vermeer recommends the following for HDD rigs up to 100,000 pounds. (Remember, the reamer is 1.5 times the size of your product up to 9 inches. For product 10 inches and larger, the reamer is 1.3 times larger.)

Next, you will need to calculate the soil safety factor by determining the ratio of fluid pumped to soil conditions.

Armed with the information from these charts, as well as your drill rod length and your drill rig's pump output, you can now calculate the reamer pullback drill rate.

For example, if you were going to use a Vermeer D20x22 S3 Navigator horizontal directional drill to do a 300-foot bore in sandy clay and pull back a 4-inch gas line (pulling a 6-inch reamer), you should be using around 44 gallons of fluid per rod (1.47 gal/ft x 10 ft] x 3 divided by 25 gpm = 1.76 min/rod x 25 gpm = 44 gallons). Each rod is 10 feet long, so you will use 30 rods for the job, which means you’ll need approximately 1,320 gallons of fluid for the project.
Performing this calculation before a project begins will help with the estimating and planning process.
It’s common for crews to try to get by with less fluid than what is truly needed. This practice will cause drillers to outrun their mud. This means your fluid-to-soil ratio is too great and becomes too thick to pump out of the exit/entrance pit. The result of the pudding effect is an inadvertent return due to lack of flow underground. The ground will heave, product being installed will stretch, tooling can be damaged, and your tooling could potentially get stuck underground.
Using too much fluid or product is wasteful and can create excess cost. However, don’t assume that inadvertent returns are always the result of using too little fluid. Inadvertent returns can also be caused by using the wrong type or amount of fluid additives.
Mixing process
Now it’s time to evaluate how your crew is mixing drilling fluids. This job is often assigned to a new person and they usually receive training from the person who did it before they were hired. If that’s your company’s process, you need to make sure both the teacher and student know what they are doing.
First, start by checking the pH levels from your water source. Drilling fluid additives (bentonite and polymers) mix better with a pH level range between 8 and 9. Municipality water will typically measure around that range, but other water sources like ponds or wells usually fall below. Adding soda ash will help raise the pH levels and make your drilling fluid products go further.
When you’re ready to mix your additives to the water, powders like bentonite must be added to the hopper and liquids are poured directly into the tank.
Vermeer fluid mixing systems are equipped with a bag cutter next to the hopper. Use it to split the bag and then empty the whole bag into the hopper at once. Doing it this way, instead of cutting it with a knife and slowly sifting material into the hopper, will help prevent air from getting into the system, which can cause the tank to overflow and create a mess.
When adding bentonite, make sure you’re sending it through the venturi and hopper at full throttle. You want to get the maximum implosion through the venturi the first time to mix the product as well as you can. After enough bags of bentonite are mixed through the venturi, keep the product mixing through the venturi for approximately 10 more minutes until it’s thoroughly broken up and hydrated.
If you plan to add a polymer, you need to wait until the bentonite is entirely mixed, usually about 10 minutes. Adding a polymer too soon or out of sequence could cause the bentonite to ball up in the tank, rendering it ineffective. Always add a PAC polymer before a PHPA and dry polymers before liquid polymers.
The final step is to check your viscosity using a marsh funnel and cup. You want a viscosity rate of 45-60 seconds for most drilling applications. If it's too thick, add additional water or thinners; if it is too thin, add more drilling additives.
Understanding the science of mixing drilling fluids will help you take the art of drilling to the next level and help make your whole crew more productive. Learn more about this process by contacting your local Vermeer dealer or visiting Vermeer.com.